Create or Edit Blanket Warrants
A Blanket Warrant is for a specific practitioner to treat multiple patients.
Typically, warrant applications are entered by eligible prescribers using SafeScript.
Management Portal users may need to enter information from faxed applications when a practitioner is not able to use SafeScript Health Practitioner portal to enter an application.
- Super-Regulator
- Regulator
- Admin Officer
In this topic
Manually enter a Blanket Warrant
-
Search for a practitioner record as explained in Search for and Select a Practitioner
-
From the Practitioner Search Results, open the required practitioner record.
-
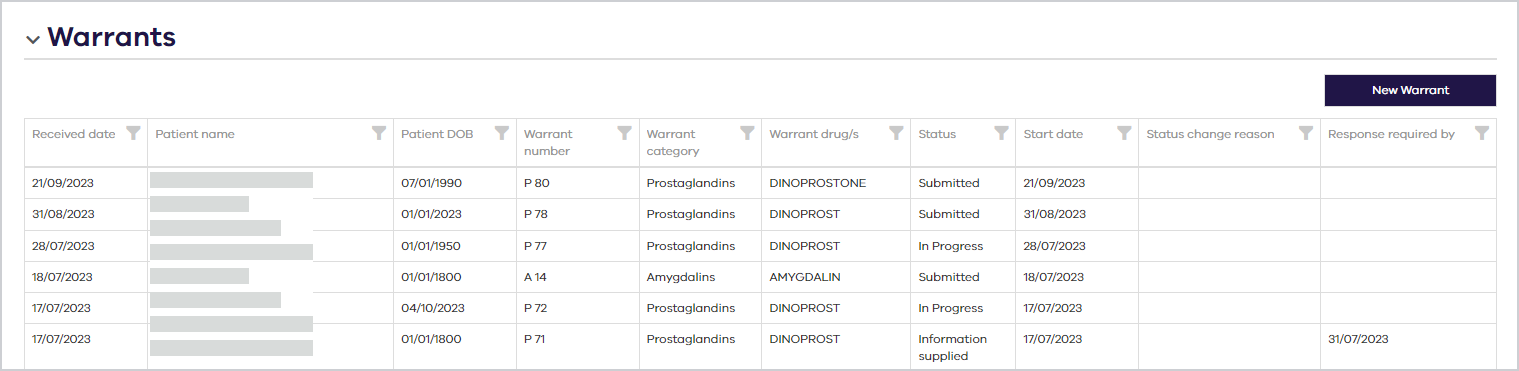
Scroll down to and open the Warrants section.
Any existing warrants will display in the grid.
-
Click New Warrant.
The Blanket Warrant popup displays.
-
Select the Practitioner address. (Mandatory)
- Review the Received date and Start date, and update if required. Default is today. (Mandatory)
- Select a Warrant category. (Mandatory)
Prostaglandins
Retinoids
Thalidomide
Ovulatory stimulants
Amygdalins
- Click Add Drugs, then select a drug from the list.
- Click out of the drug selection box.
- Continue adding any additional information in other fields—for example:
- Practitioner Information supplied
- Application information
- Once all the mandatory fields are populated, click Save.
Process a Blanket Warrant
-
Search for a practitioner record as explained in Search for and Select a Practitioner
-
From the Practitioner Search Results, open the required practitioner record.
-
Scroll down to and open the Warrants section.
Any existing warrants will display in the grid.
-
Open the relevant blanket warrant and make relevant changes as required:
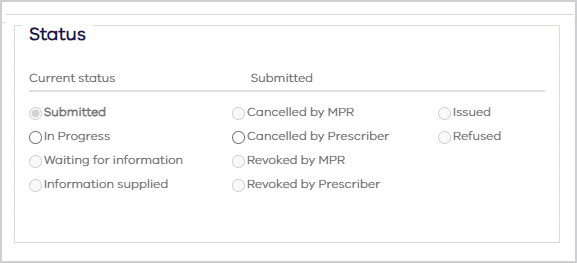
Status - depending on the Current status, you can select a new status. For example, if the Current status is Submitted, then you can select In Progress.
Correspondence - you can view, create or upload correspondence associated with this warrant in the Correspondence dropdown. See Correspondence for more details.
Notes - you can view or add Notes associated with this warrant in the Notes dropdown.
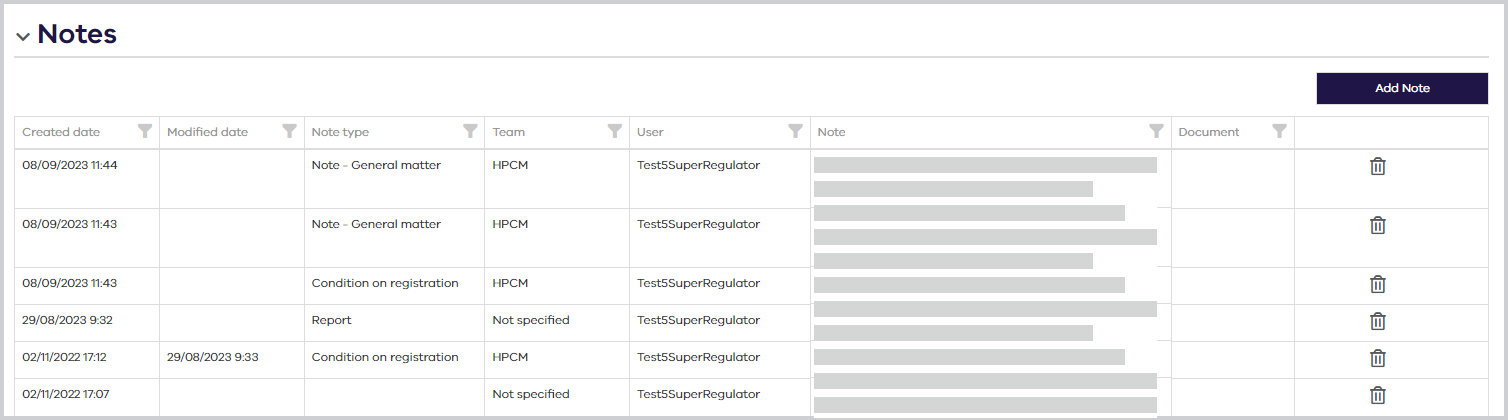
Click the filter icon in a column header to filter on that column.
You can also sort the list by clicking on a column header.
To add a note:
-
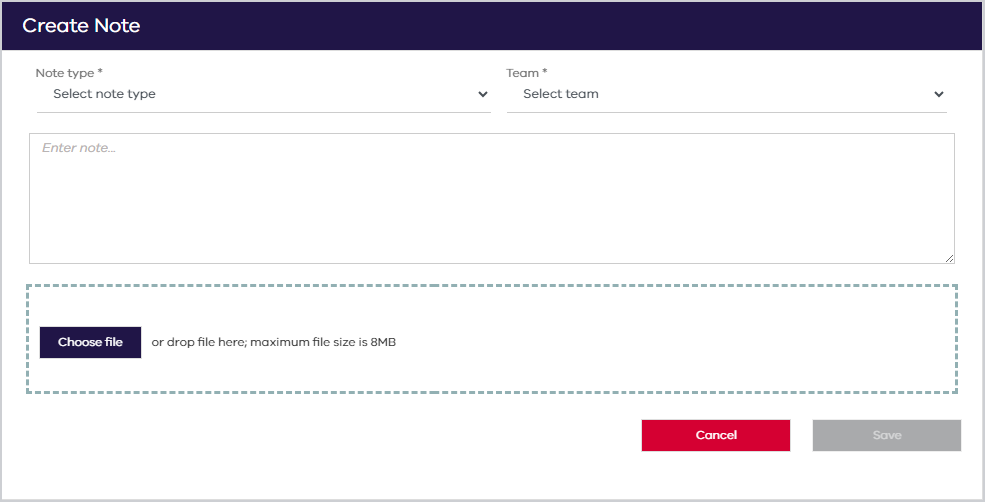
Click Add Note.
The Create Note popup displays.
-
Complete the note details.
-
Note type - (Mandatory)
-
Team - (Mandatory)
-
Note - Enter text for the note.
-
File attachment - Choose a file or use drag and drop. (8 MB maximum)
When all the mandatory fields have been completed, Save is enabled.
-
-
Save the note.
To delete a note, click the trash icon .
You can only delete a note if you created it. Super Regulators can delete any notes.

-
-
When all the changes have been entered, click Save.
