Create or Edit Client Warrants
A Client Warrant is for a specific practitioner to treat a specific patient.
Warrants are required for prescribers who need to treat patients with one or more of the certain restricted Schedule 4 medicines.
Typically, warrant applications are entered by eligible prescribers using SafeScript.
Management Portal users may need to enter information from faxed applications when a practitioner is not able to use SafeScript Health Practitioner portal to enter an application.
- Super-Regulator
- Regulator
- Admin Officer
In this topic
Manually enter a Client Warrant
- Search for a patient record, as explained in Search for and Select a Patient.
- From Patient Search Results, open the required regulatory profile or linked profile.
-
Scroll down to and open the Warrants section.
Any existing warrants will display in the grid.

-
Click New Warrant.
The Create Warrant popup displays.
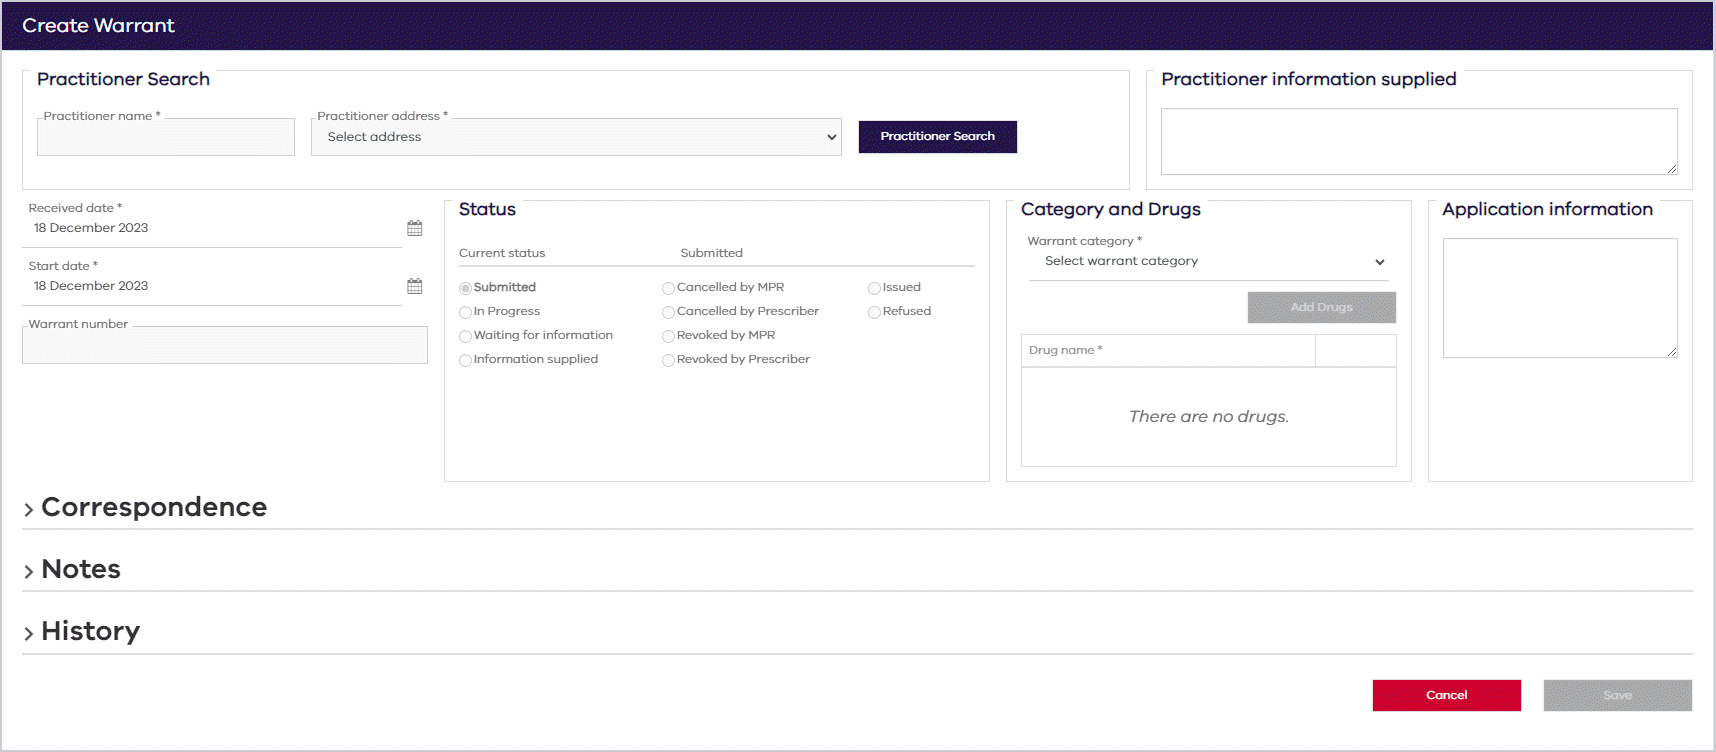
- Next, add a Practitioner and Practitioner Address. (Mandatory)
Click Practitioner Search.
The Practitioner Search popup displays.
Search for the practitioner by entering at least one character of the practitioner's First Name and/or Surname and then clicking Search.
Alternatively, you can search by Unique ID.
- In the Practitioner Search Results, select the checkbox for the relevant practitioner, then click OK.
- Select the Practitioner address.
- Review the Received date and Start date, and update if required. Default is today (Mandatory).
- Select a Warrant category. (Mandatory)
Prostaglandins
Retinoids
Thalidomide
Ovulatory stimulants
Amygdalins
- Click Add Drugs, then select a drug from the list.
- Click out of the drug selection box.
- Continue adding any additional information in other fields—for example:
- Practitioner Information supplied
- Application information
- Once all the mandatory fields are populated, click Save.
The Patient Profile displays with the new warrant added to top of the Warrants grid. The Warrant number is automatically assigned, with the first letter indicating the Warrant category—for example P for Prostaglandins.

Process a Client Warrant
- Search for a patient record, as explained in Search for and Select a Patient.
- From Patient Search Results, open the required regulatory profile or linked profile.
-
Scroll down to and open the Warrants section.
Any existing warrants will display in the grid.
-
Open the relevant warrant and make relevant changes as required.:
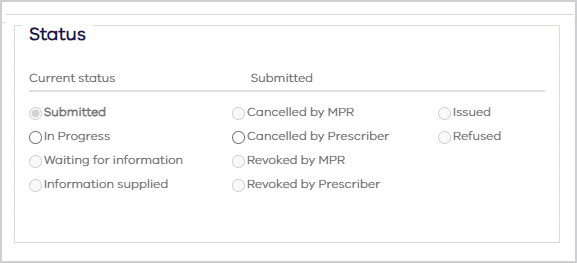
Status - depending on the Current status, you can select a new status. For example, if the Current status is Submitted, then you can select In Progress.
Correspondence - you can view, create or upload correspondence associated with this warrant in the Correspondence dropdown. See Correspondence for more details.
Notes - you can view or add Notes associated with this warrant in the Notes dropdown.
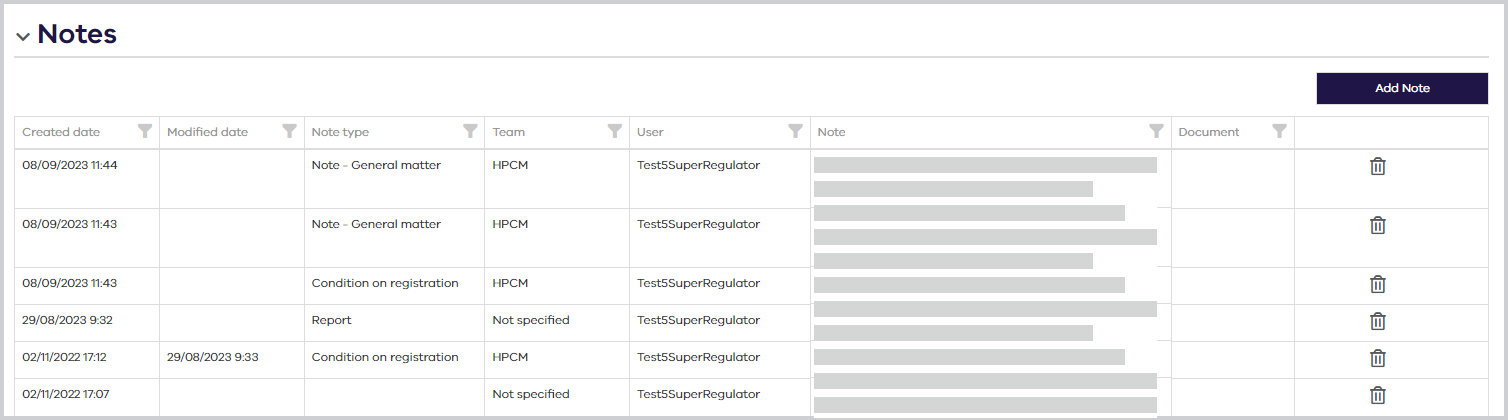
Click the filter icon in a column header to filter on that column.
You can also sort the list by clicking on a column header.
To add a note:
-
Click Add Note.
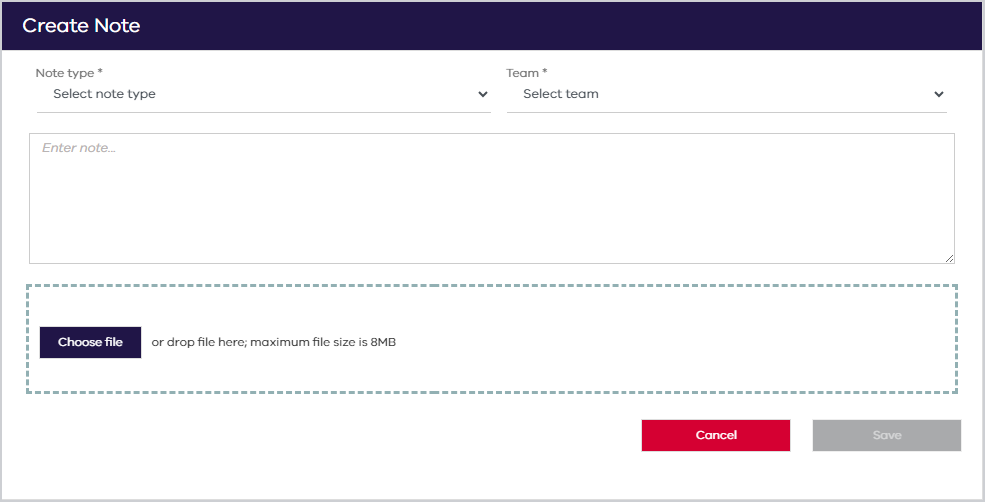
The Create Note popup displays.
-
Complete the note details.
-
Note type - (Mandatory)
-
Team - (Mandatory)
-
Note - Enter text for the note.
-
File attachment - Choose a file or use drag and drop. (8 MB maximum)
When all the mandatory fields have been completed, Save is enabled.
-
-
Save the note.
To delete a note, click the trash icon .
You can only delete a note if you created it. Super Regulators can delete any notes.

-
-
When all the changes to the warrant have been entered, click Save.
Move a Client Warrant to a Different Patient Record
If a client warrant has been created for the wrong patient, you can move it to a different patient.
-
Access the client warrant.
-
Click the Move Warrant button.
The Patient Search popup displays
-
Search for and select the patient that you want to move the warrant to.
-
Click OK.
The following Confirmation popup displays.
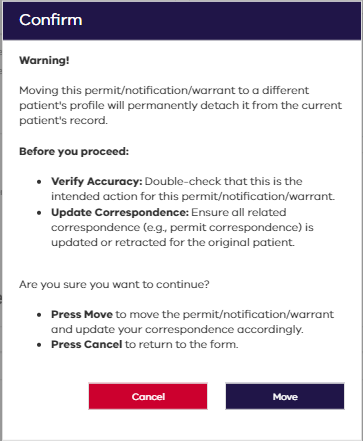
Before proceeding, make sure you have verified the accuracy and updated the correspondence.
-
If you need to make changes or are unsure, press Cancel to return to the form.
-
If you are certain that you want to proceed, click Move.
